
The following page details how the files would need to be prepared and uploaded into Mosaiq.
GTFS data upload functionality for all Mosaiq products is found within Mosaiq Live and available to users with an “Admin” role type.
File preparation
Files for upload must be GTFS standard – for more information on GTFS standard files go to GTFS standard reference.
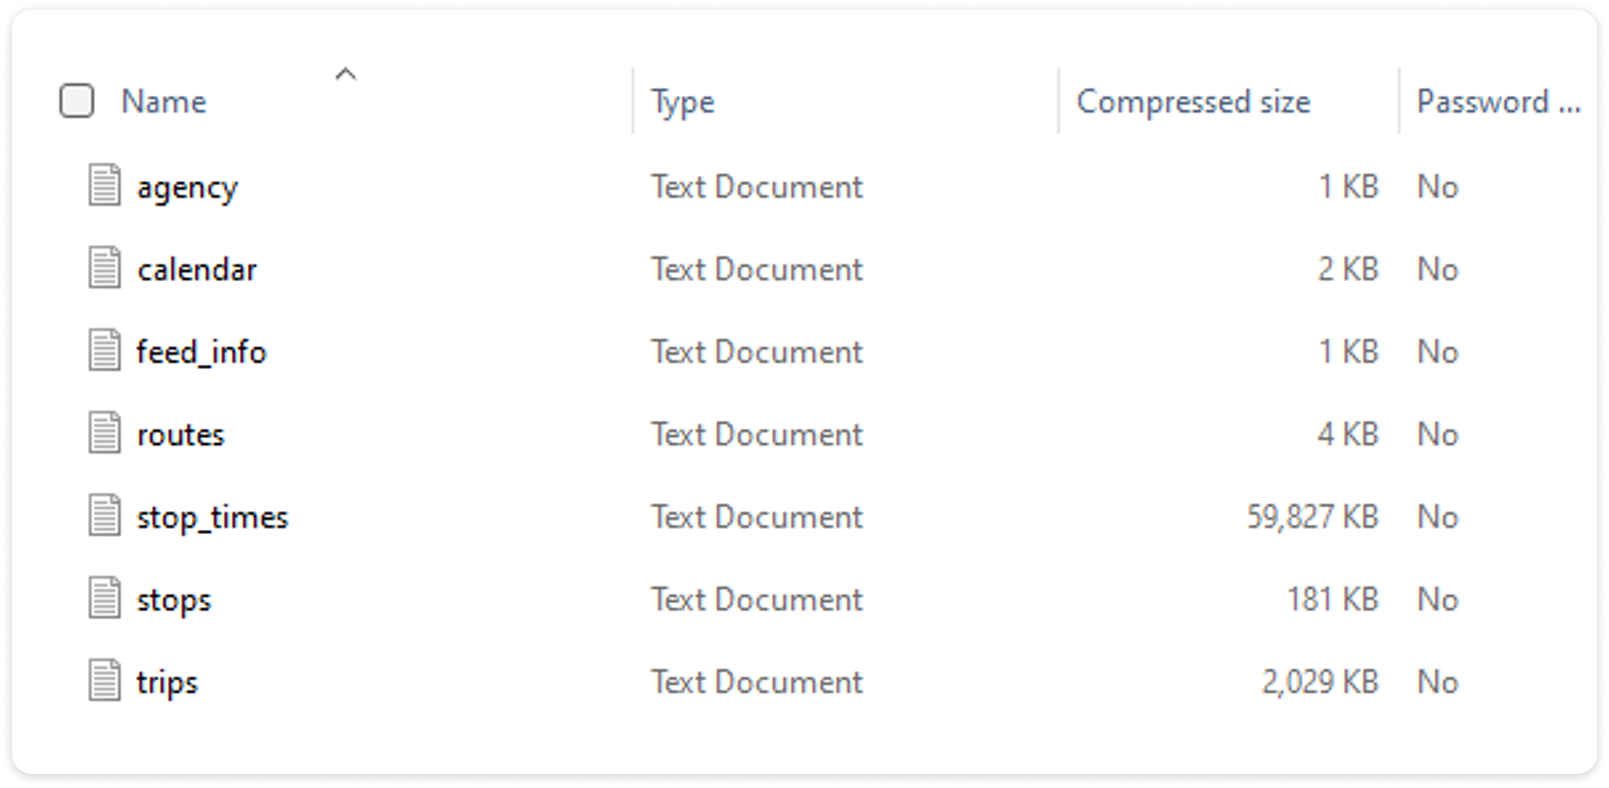
The GTFS Standard zipped file needs to contain the following txt files:
-
agency
-
calendar
-
feed_info*
-
routes
-
stop_times
-
stops
-
trips
* The feed_info.txt file is optional in the GTFS standard. However, Mosaiq requires it for reasons including date range and feed_version information. Ask your channel partner for a template feed_info file or visit https://gtfs.org/schedule/examples/feed-info/.
Note:
-
The file must have a feed_start_date no older than 7 calendar days ago.
-
The file must be a single zip file with a size no larger than 2GB.
-
Only one file may be uploaded at a time.
If you have a file in the zipped file that is larger than the specified volume, get in touch with your channel partner for other ways to upload.
Upload
The GTFS Schedule dataset must be loaded into Mosaiq before it takes effect in the network. This is so that when the real-time heartbeats start flowing into the app the data can be matched against the correct scheduled data.

-
In Mosaiq Live: click ”Upload GTFS file” in the left-hand navigation (1).
-
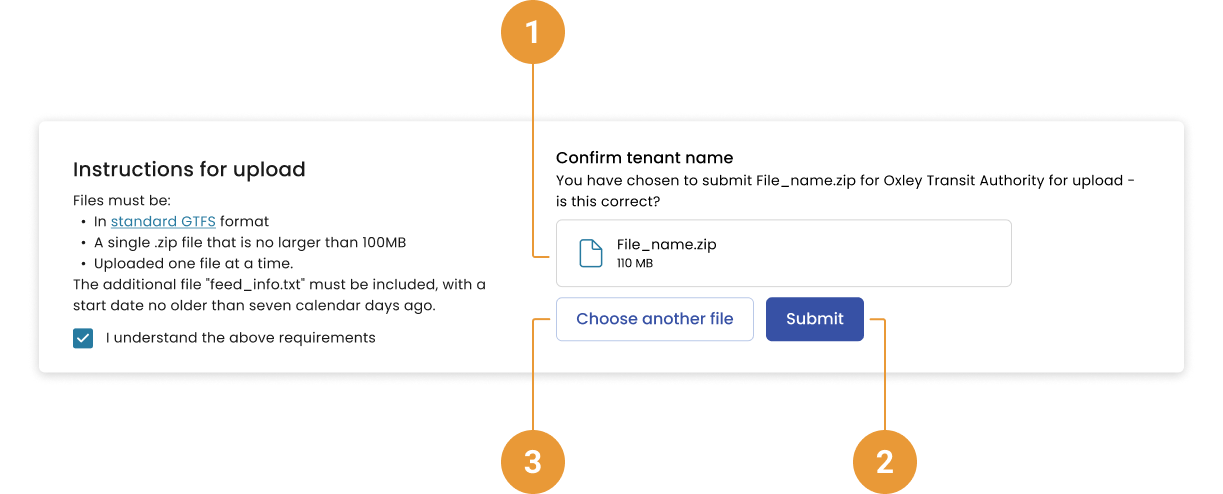
Check through the file requirements listed (2).
-
Once you’re confident your data upload complies with the file requirements, tick ”I understand the above requirements” to activate the drag and drop upload box (3).
-
Drag and drop your GTFS file into the box or select “Choose file” and browse your computer to locate your file (4).
Submission
-
Once you’ve dropped/selected your file for upload, first check it is the correct file and for the correct customer (1).
-
When you’re sure you’ve selected the correct file, click ”submit” (2). If you’ve selected the wrong file, click ”Choose another file” (3) and repeat the uploading GTFS data process.
-
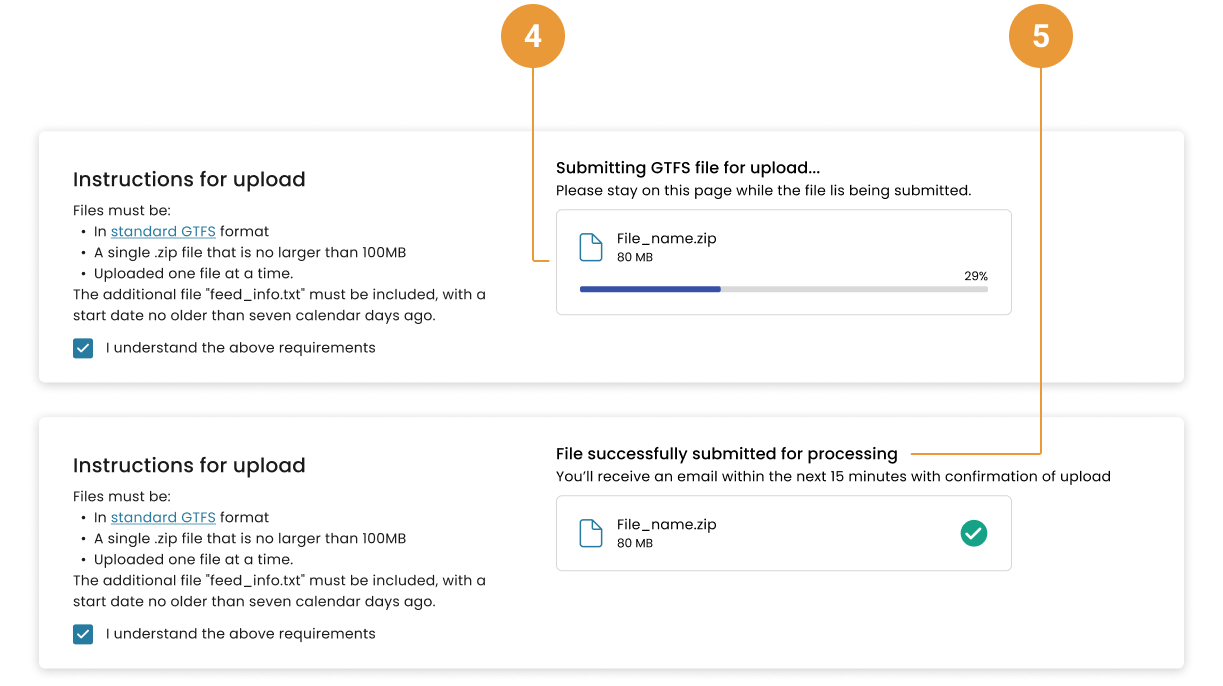
The file may take a few moments to load. Please wait whilst the file is submitted (4).
-
Once the file is successfully submitted you will receive a confirmation on the screen (5).
Mosaiq Insights will check and validate your data upload.
You’ll receive an email with your GTFS file upload status within 15 minutes of your file upload.
If you want to upload a data file with contents older than 7 calendar days, please contact your channel partner first.
Confirmation email
Mosaiq Insights will check and validate your data upload.
You’ll receive an email with your GTFS file upload status within 15 minutes of your file upload.
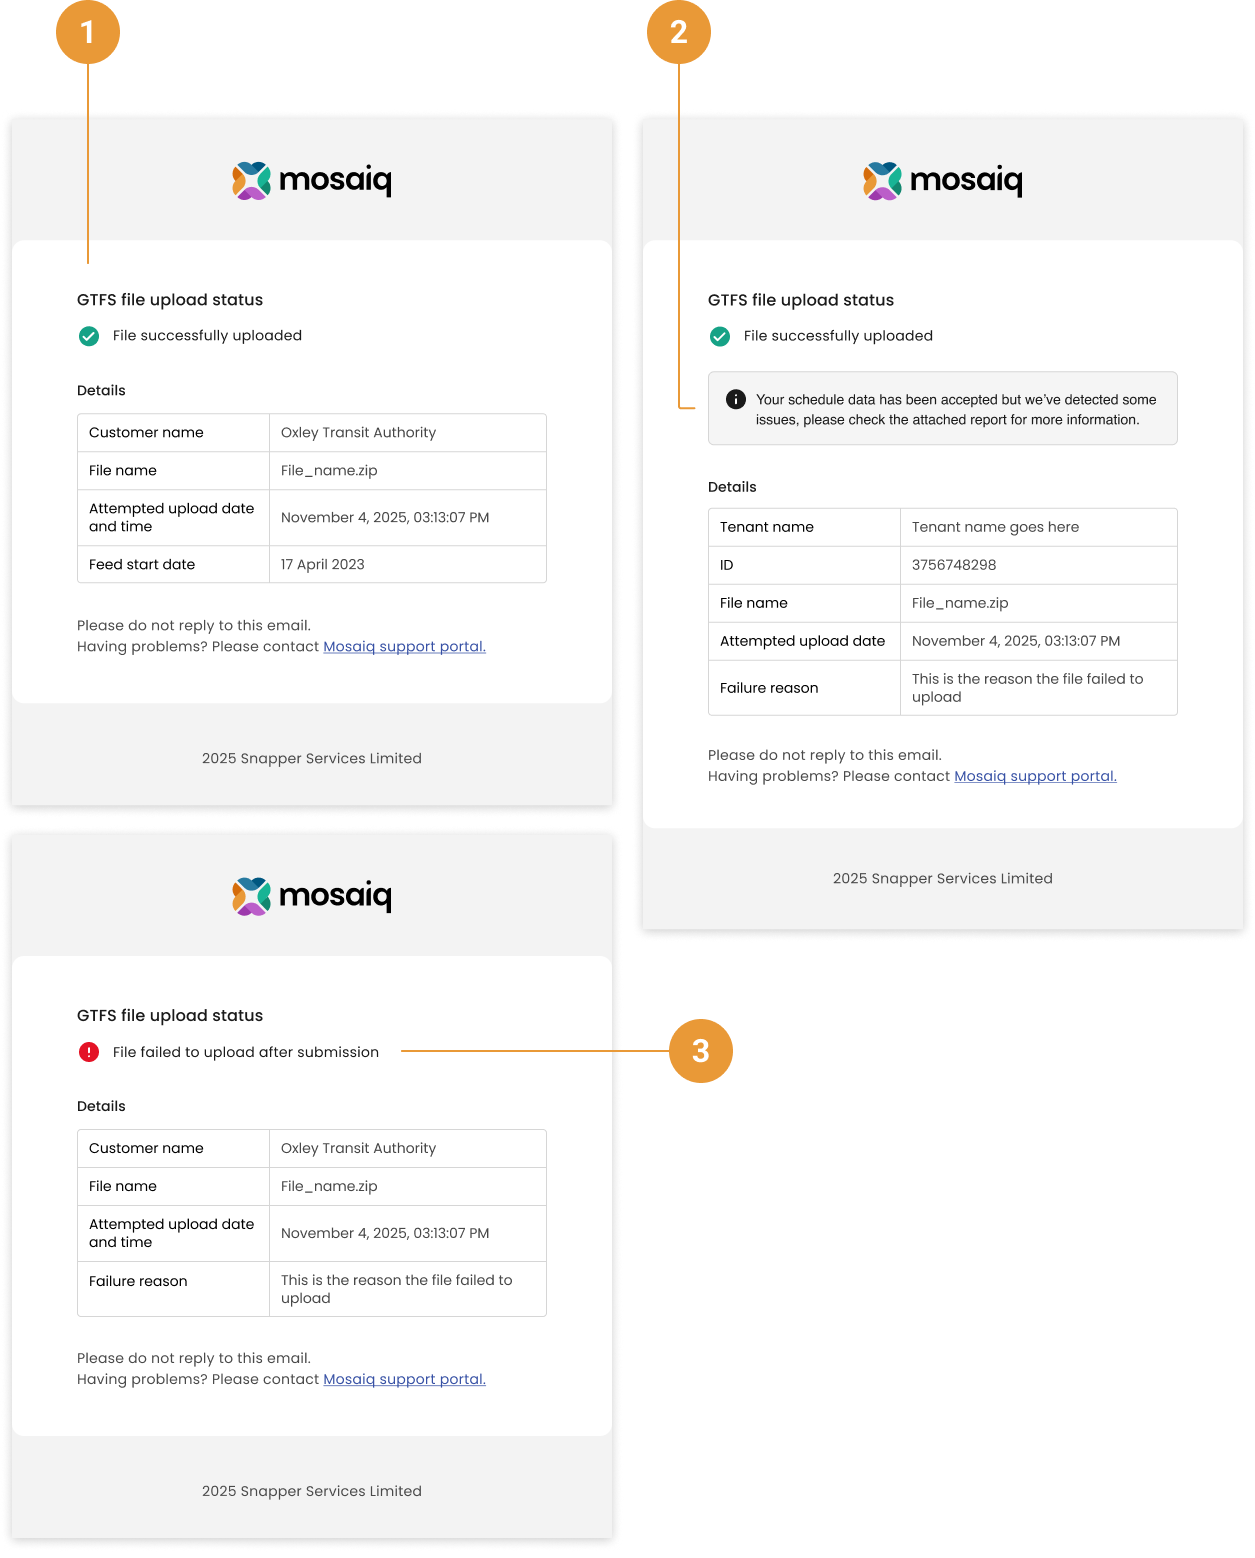
You will encounter one of the following scenarios:
-
Your GTFS upload succeeds with no issues (1)
-
Your GTFS upload succeeds, but issues were detected; a failure reason is provided and a detailed report is attached to the email (2)
-
Your GTFS fails to load; a failure reason is provided and a detailed report is attached to the email (3)
If your GTFS data file fails to upload:
-
Check your file contents against the GTFS Standard and try again.
-
If the upload still fails, contact your channel partner or Mosaiq Operations for assistance.
Detailed GTFS error report
If your file fails to upload, you will receive a detailed error report attached to an email. Please note that this email may take up to 10 minutes to arrive and will be sent to your login email address.
The error report provides comprehensive information about your file upload, including details on how well your files comply with GTFS standards. Use this report to identify and resolve any issues before attempting another upload.
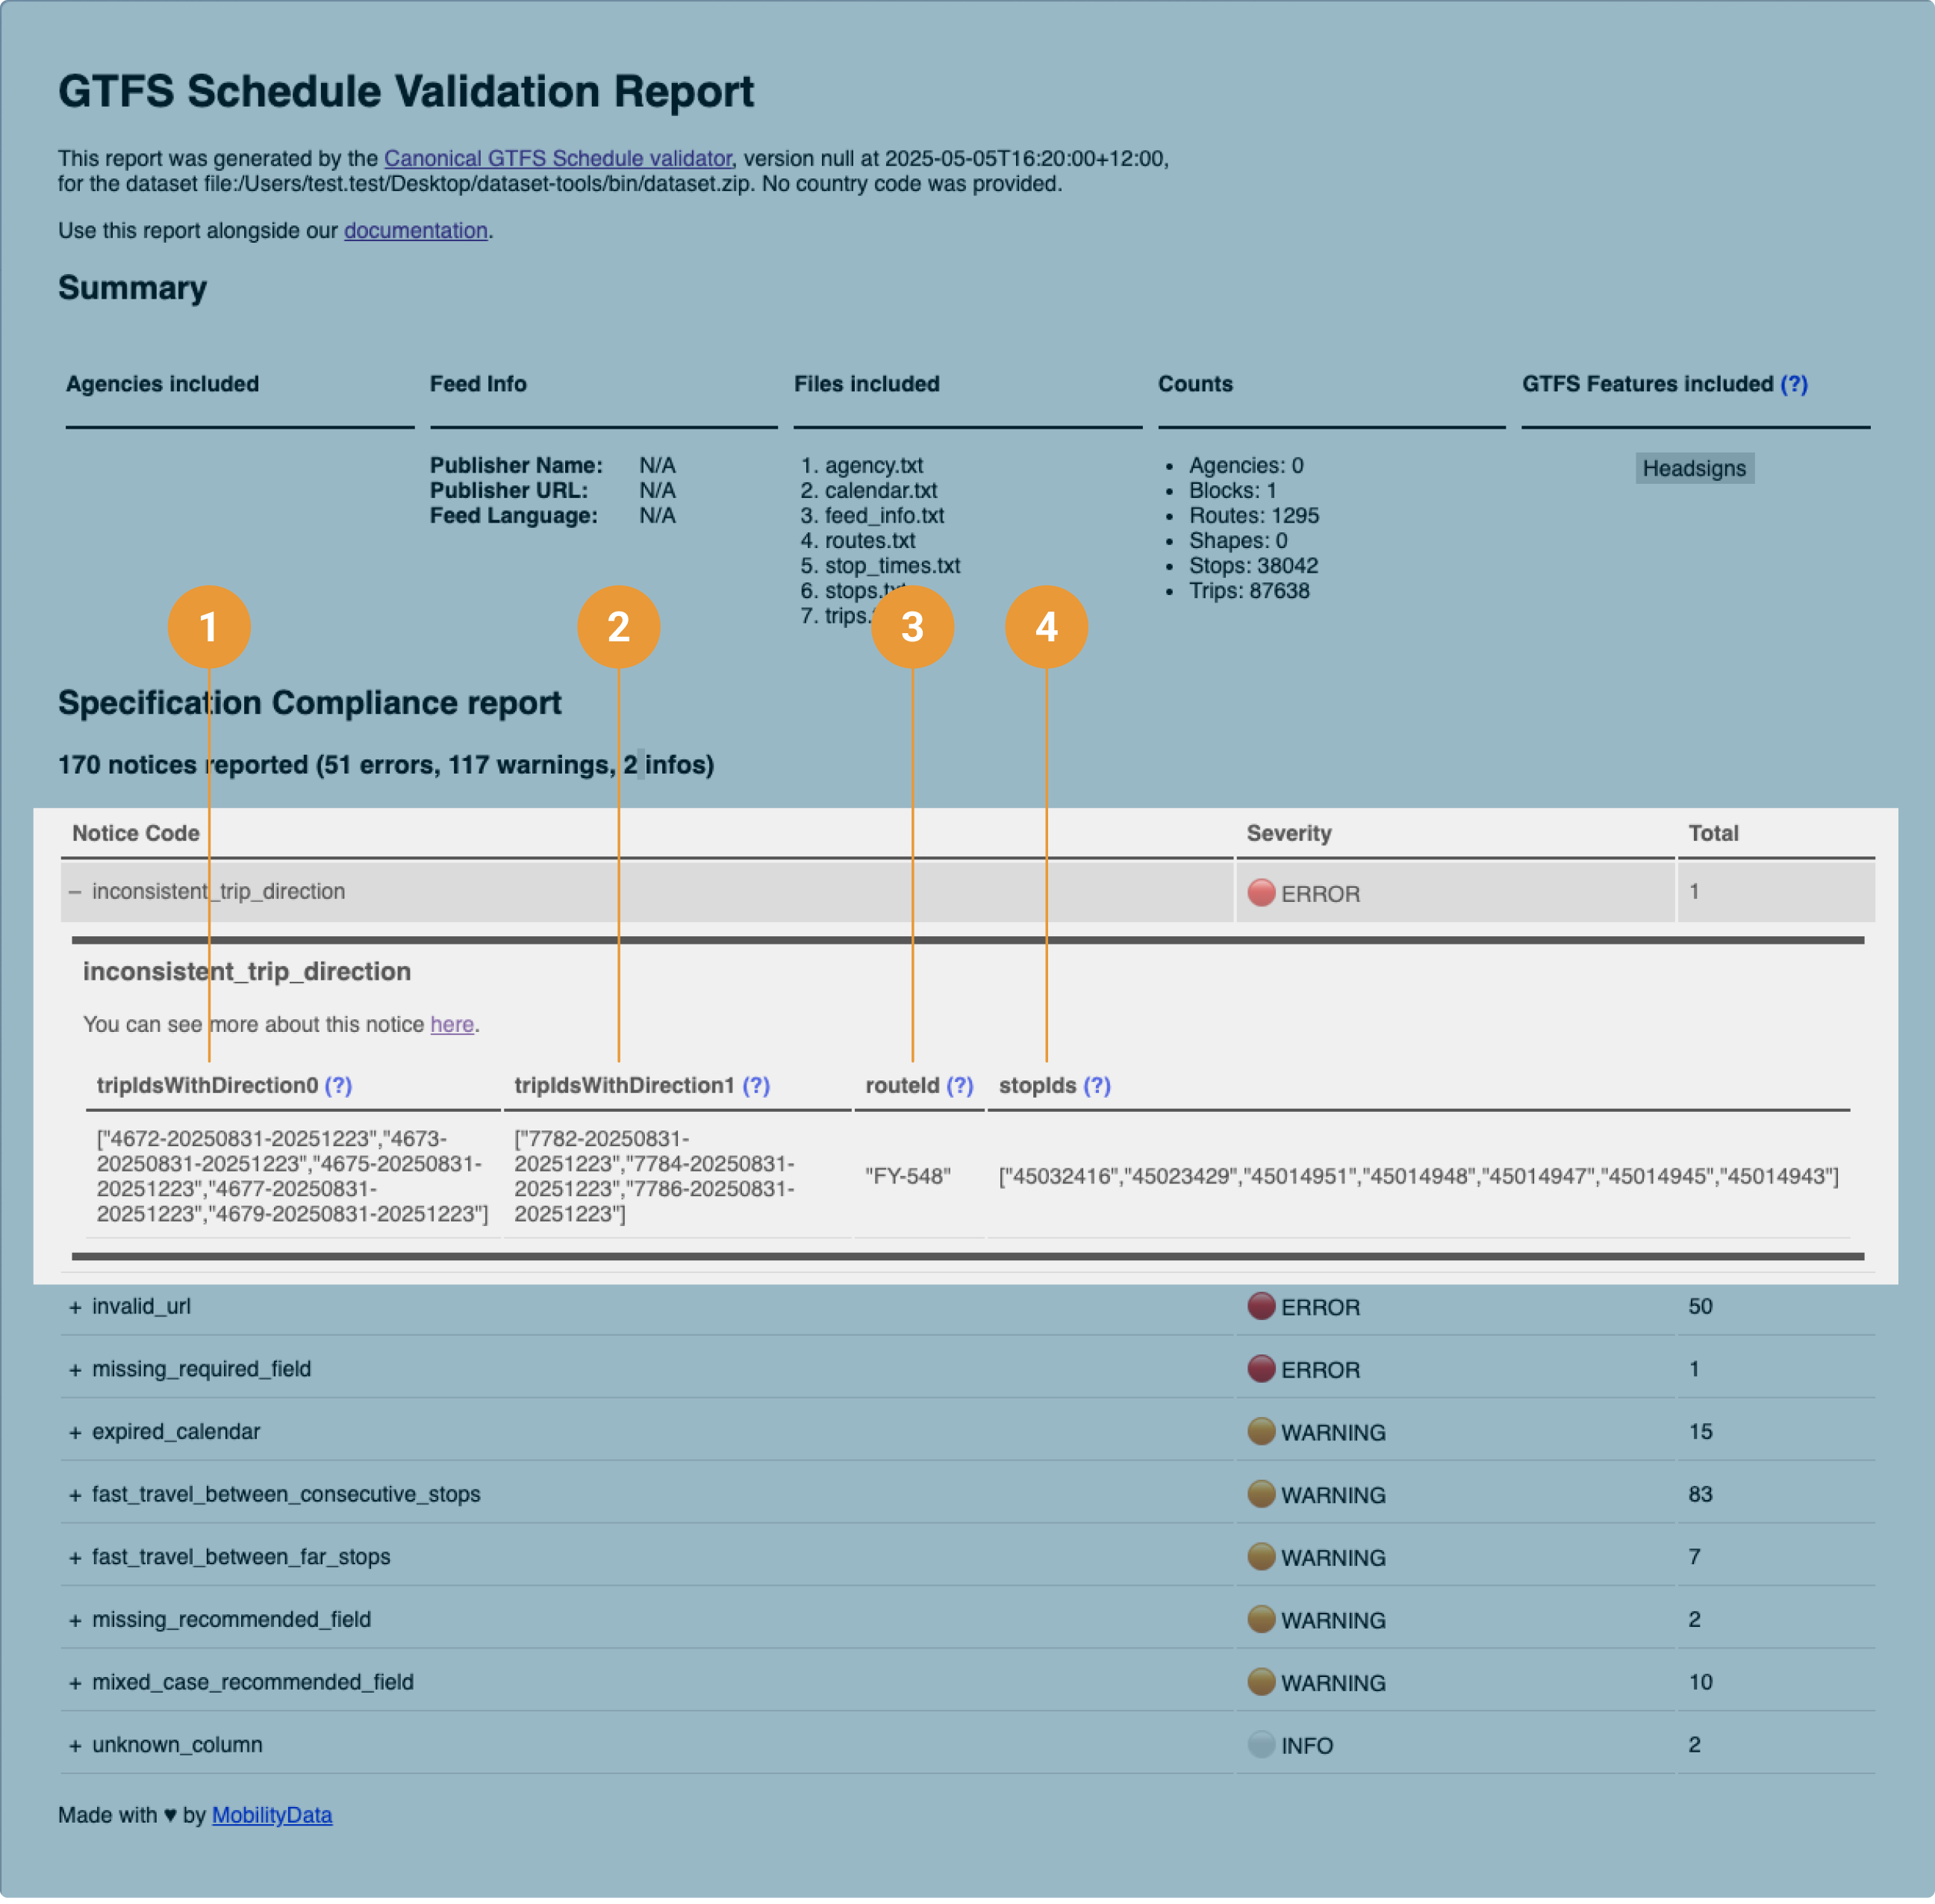
Example Error: Inconsistent Trip Direction
One common issue highlighted in the report is “Inconsistent trip direction.” This is a Mosaiq-specific validation related to the direction assigned to trips within your GTFS file.
What does this mean?
If your GTFS file contains multiple trips on the same route (3), passing through the same set of stops in the same order (4), but with different direction values (e.g., 5 trips with direction 0 (1) and 3 trips with direction 1 (2)), this inconsistency will be flagged.
How to resolve?
Review the direction values for the affected trips. Ensure trips traveling in the same direction along the same route and stop sequence, have the same direction value. Update the direction field in your GTFS file as needed, then re-upload the corrected file.
For more information on GTFS trip direction, see the official GTFS reference: https://gtfs.org/schedule/reference/#tripsstxt%E2%80%9D
Recent uploads
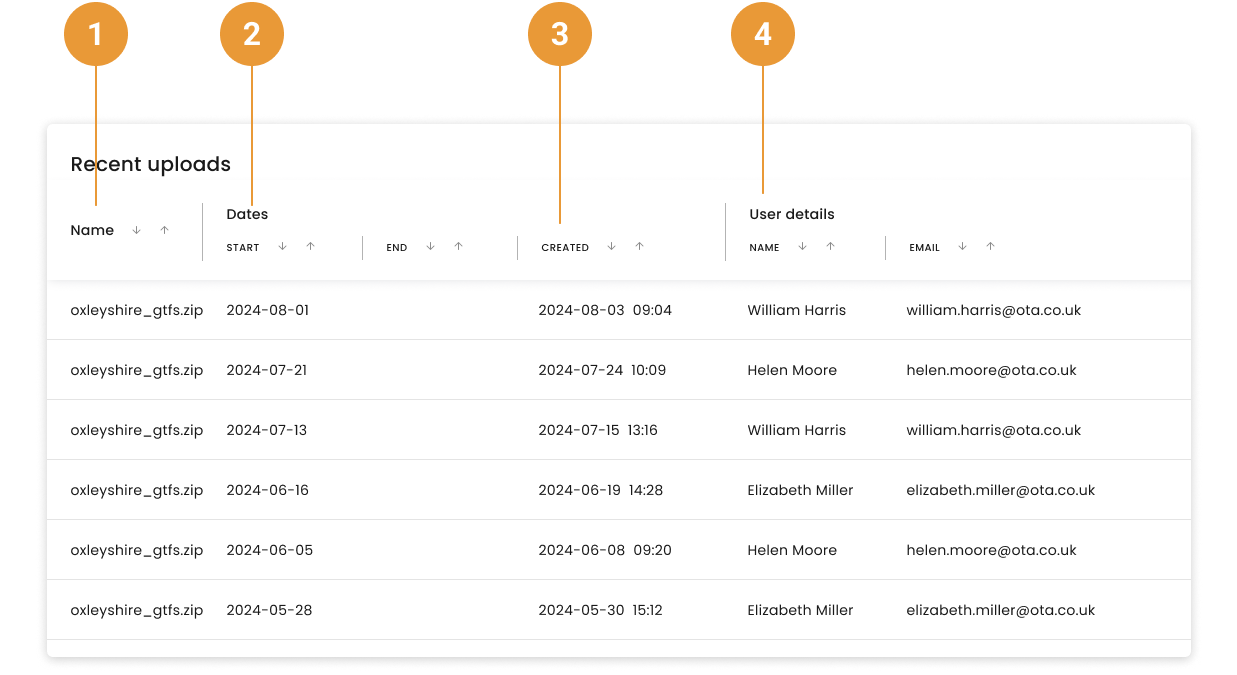
The Upload GTFS page shows the history of previous GTFS uploads:
-
Name - filename that was uploaded (1)
-
Dates - shows the time range of the GTFS set that was uploaded (2)
-
Created - shows when the GTFS was uploaded and at what time (3)
-
User - Username of who uploaded it and from which email (4)
Importing historical data
Contact your channel partner or submit a request if you wish to import historical data.