
Time-of-Day filtering is currently in closed beta and available to a limited number of customers. General availability will be announced soon.
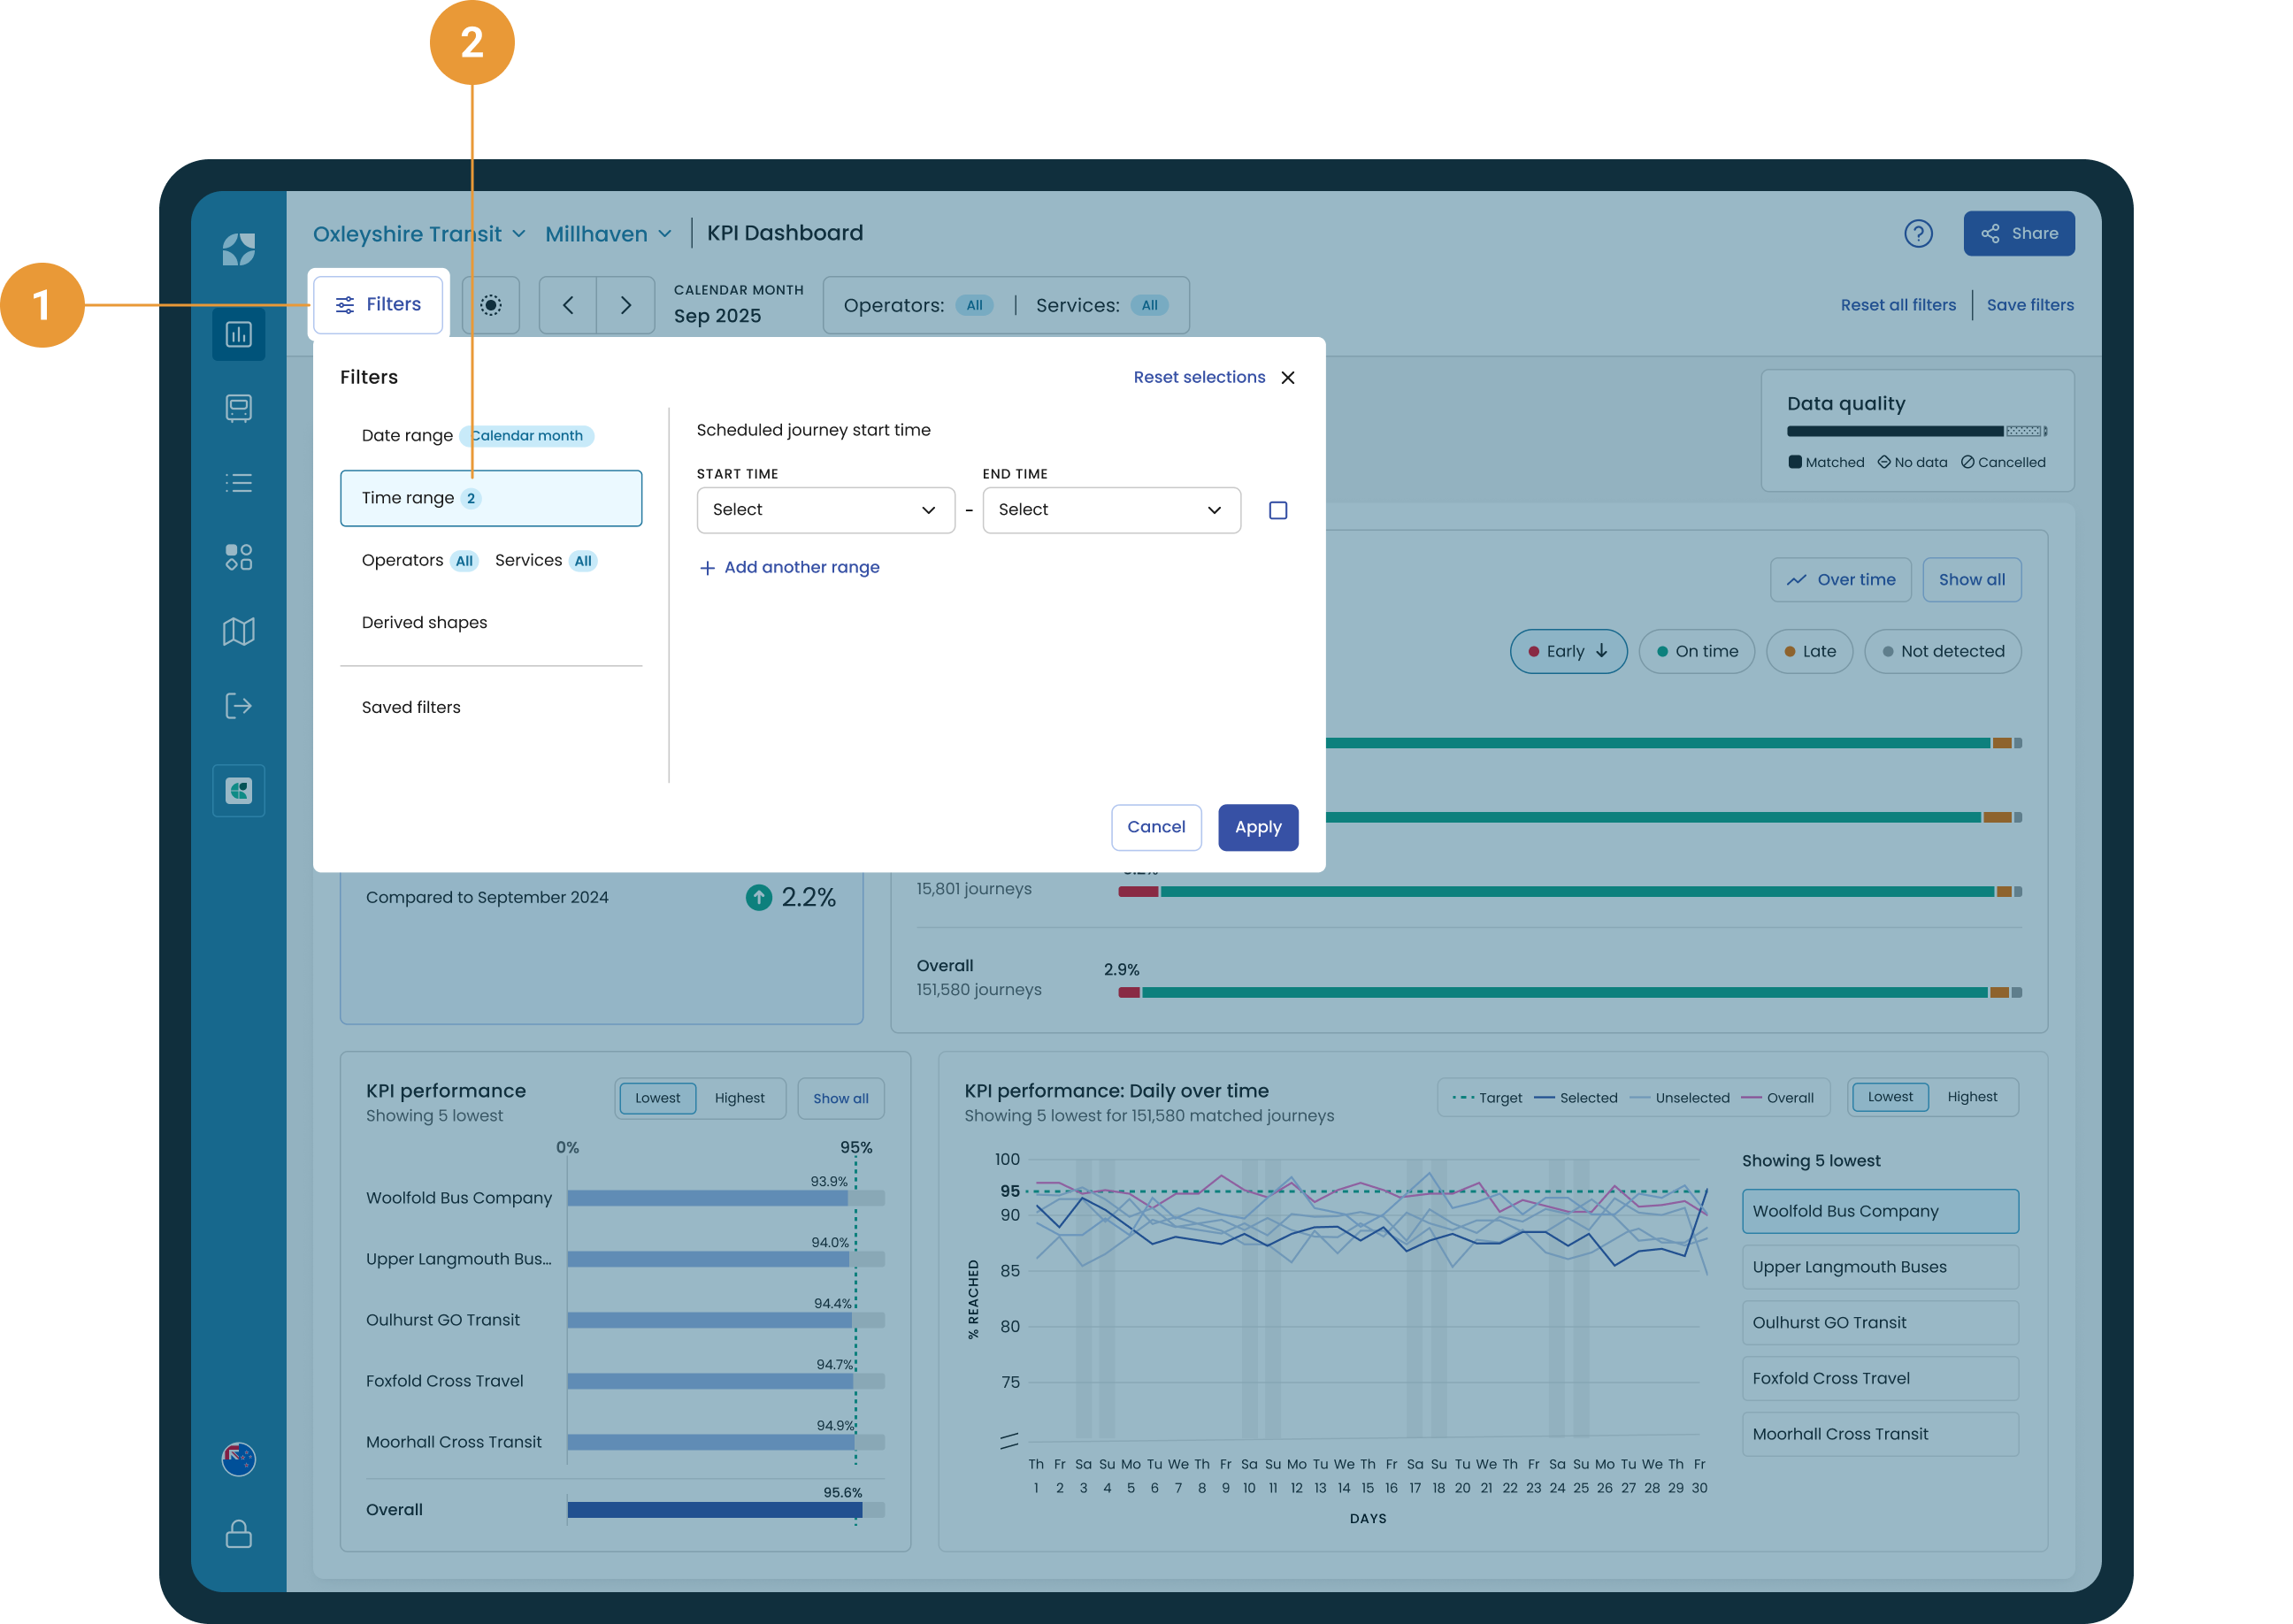
The time filter can be accessed from within the filter hub (1) under the time range tab (2). The time range you’ve selected stays persistent as you explore Mosaiq Insights.
The time range filter applies to scheduled trip start times. Any journey that is scheduled to start on or after the start time and before the end time will be displayed and included in the insights shown.
Therefore, stop level pages (such as the Network map and Stop details) may display stop arrival and/or departure times outside of your selected time range.
Selecting a time range
To view performance within a specific time range:
-
Click the time range tab in the filter hub
-
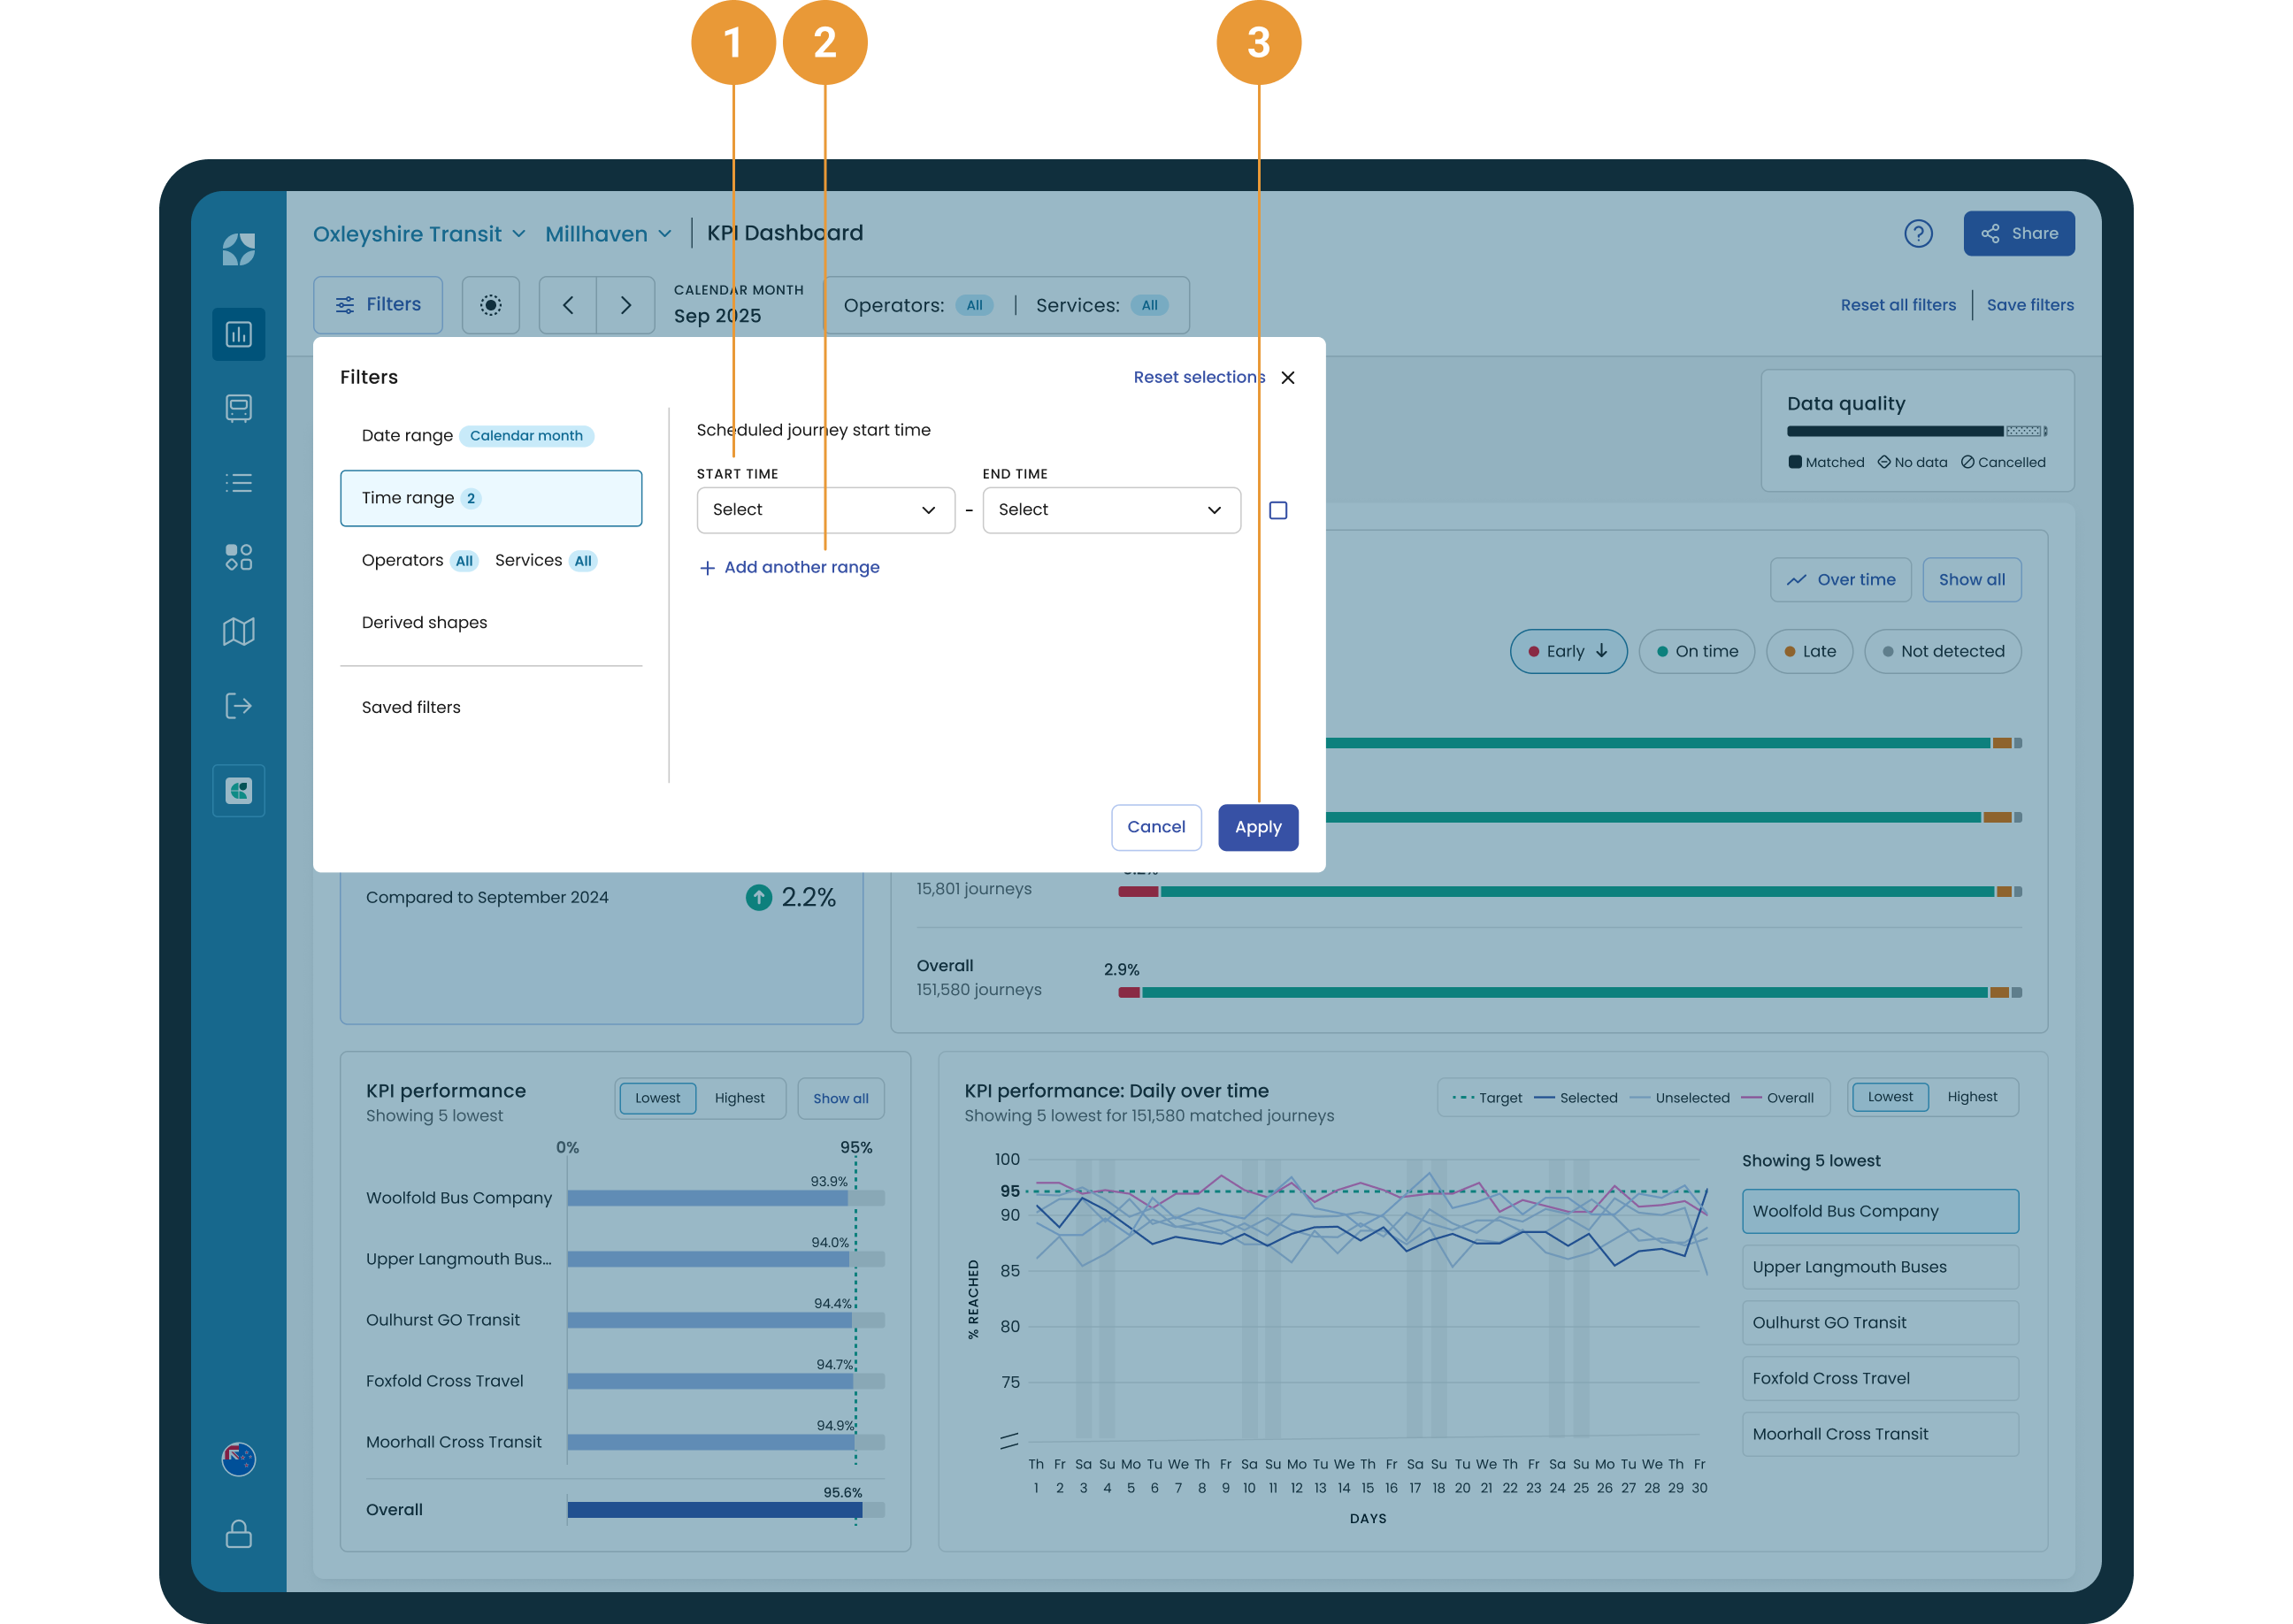
Select the time range to include by selecting a start and end time (1). Each dropdown displays a list of available times in 30 minute windows from 00:00 to >04:00+1.
-
Click “+ Add another range” to include more than one time range (2)
Times are shown in 24-hour format.
A “+1” is used to denote scheduled start times that occur after midnight on the same service day.
Click “Apply” to confirm your time range(s) or cancel (3) to return to the page without amending the time range. The “X” to the top right of the window will also cancel your selection.
Remove a specific time range entry by clicking the trash icon ( ![]()

When time range filters have been applied, a chip is shown in the filter panel (4). The chip will include a badge that provides either:
-
The start and end time when a single time range is applied, or
-
The number of time range filters applied when more than one time range is applied
For example, if a user applies:
-
A single time range, from 06:30 to 09:00, the badge would include the text “06:30 - 09:00”
-
A time range of 06:30 to 09:30 and 15:00 to 18:00, the badge would include the number 2 to indicate that two time range filters have been applied
To edit the time range filters that have been applied, either:
-
Click open the filter hub and navigate to the Time range tab, or
-
Click the chip which will open to the Time range tab within filter hub
The chip can be dismissed at any time by clicking the “x”.
Example: Selecting peak and off-peak services
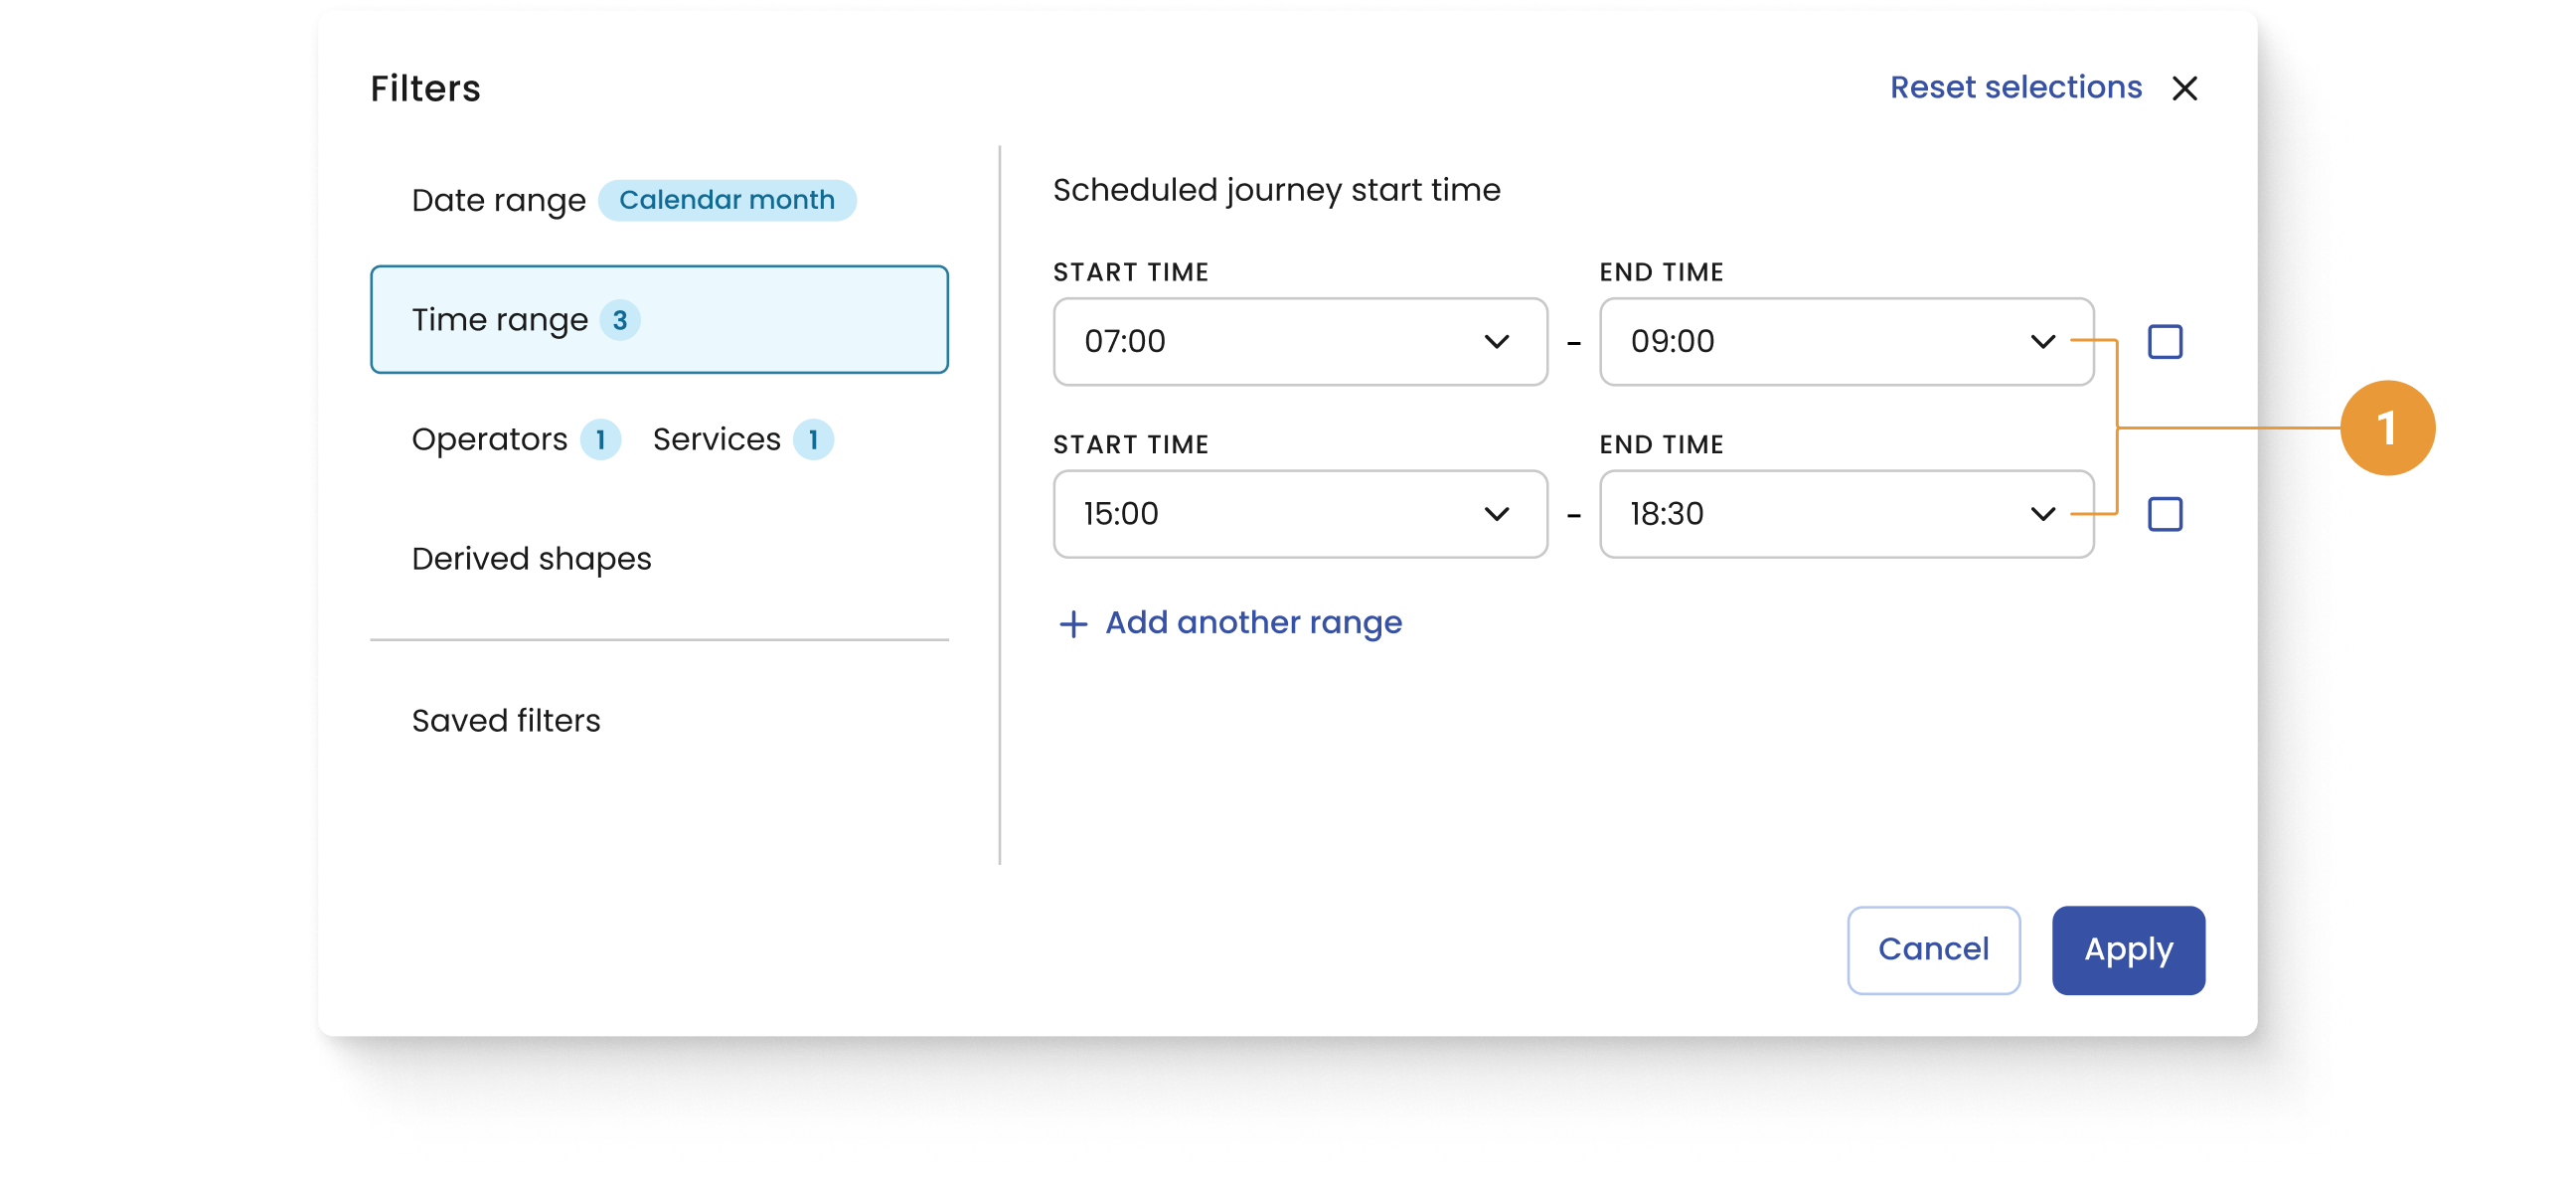
I want to compare the network performance between peak and off-peak. For this example, peak occurs between 7-9am and 3-6.30pm.
Selecting peak times:
-
Open the filter hub and navigate to the time range tab
-
Input two time ranges (1):
-
Select a start time of 07:00 and end time of 09:00 in the dropdowns
-
Click to “+ Add another range”
-
Select a start time of 15:00 and end time of 18:30 in the dropdowns
-
-
Click “Apply” to confirm your selection
Any journey that is scheduled to start at 7am and before 9am, and at 3pm and before 6.30pm, will be displayed and included in the insights shown.
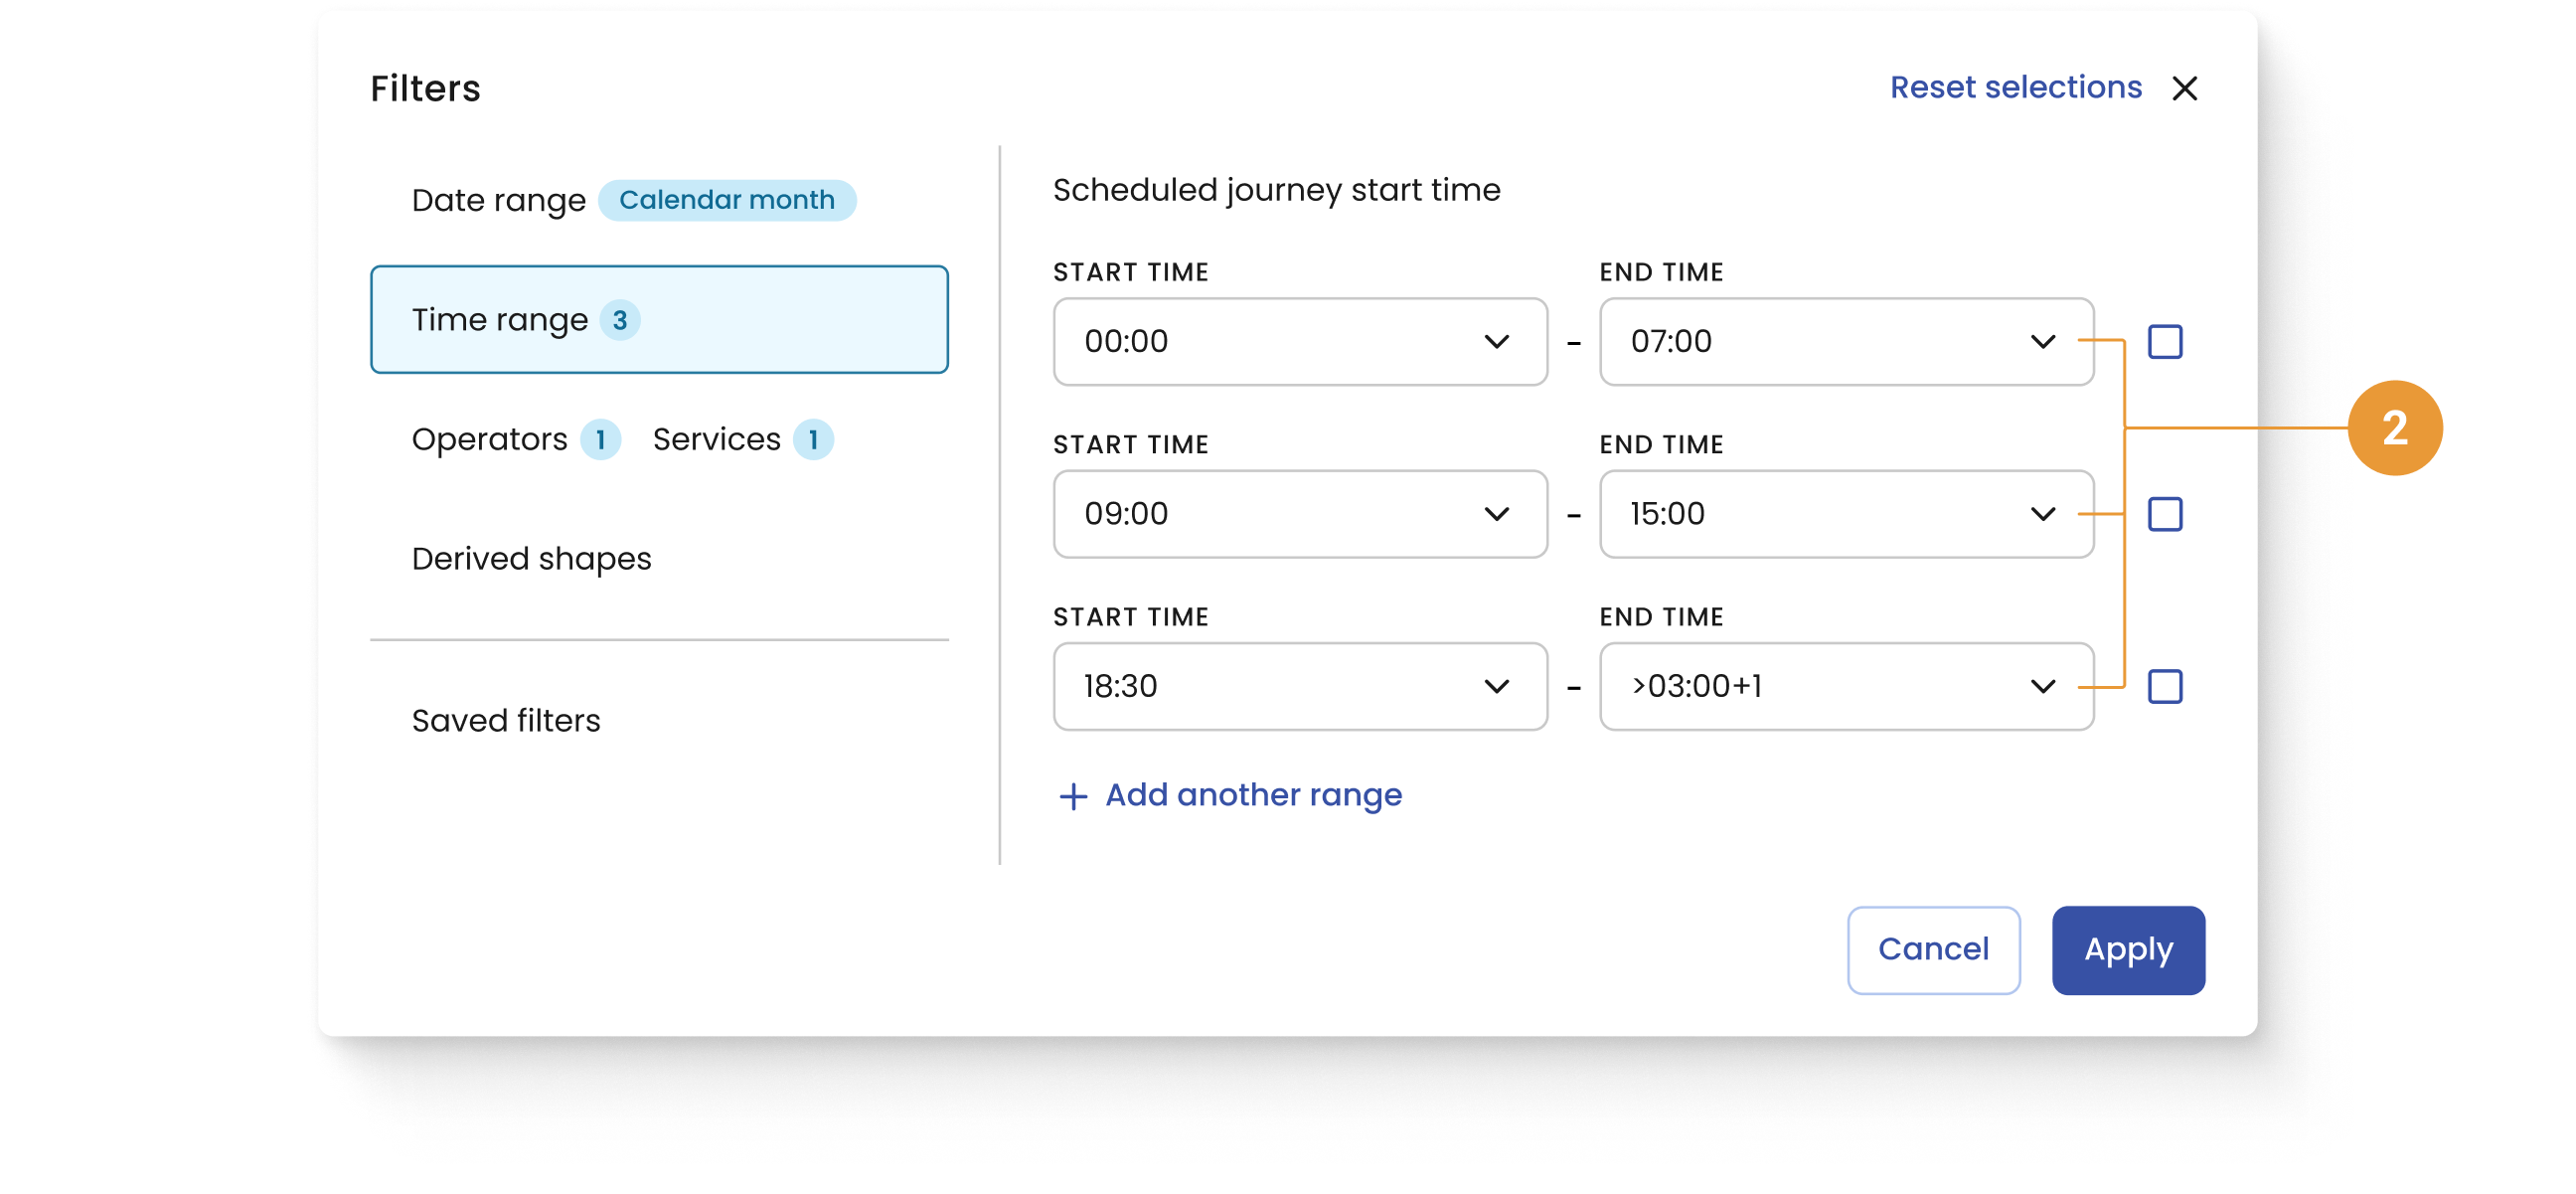
Selecting off-peak times:
-
Open the filter hub and navigate to the time range tab
-
Input three time ranges (2):
-
Select a start time of 00:00 and end time of 07:00 in the dropdowns
-
Select a start time of 09:00 and end time of 15:00 in the dropdowns
-
Select a start time of 18:30 and end time of >03:00+1 in the dropdowns
-
-
Click “Apply” to confirm your selection
Any journey that is scheduled to start at midnight and before 7am, at 9am and before 3pm, and after 6.30pm, will be displayed and included in the insights shown.